Have staffing changes you need to take care of over the break? Read through this post to learn how to give your user list a refresh by clearing out who no longer needs access and setting up the right people for success in the year ahead.
Dec 30
A new year brings new programs, new priorities, and often… new people! It’s the perfect time to give your user list a refresh by clearing out who no longer needs access and setting up the right people for success in the year ahead.
Empty space, drag to resize
Out with the old...
Let's get started by removing users who no longer need access. Maybe you had some students graduate this December! Starting the year by removing users who no longer need system access helps protect sensitive data and reduce clutter.
To remove a user in Fusion:
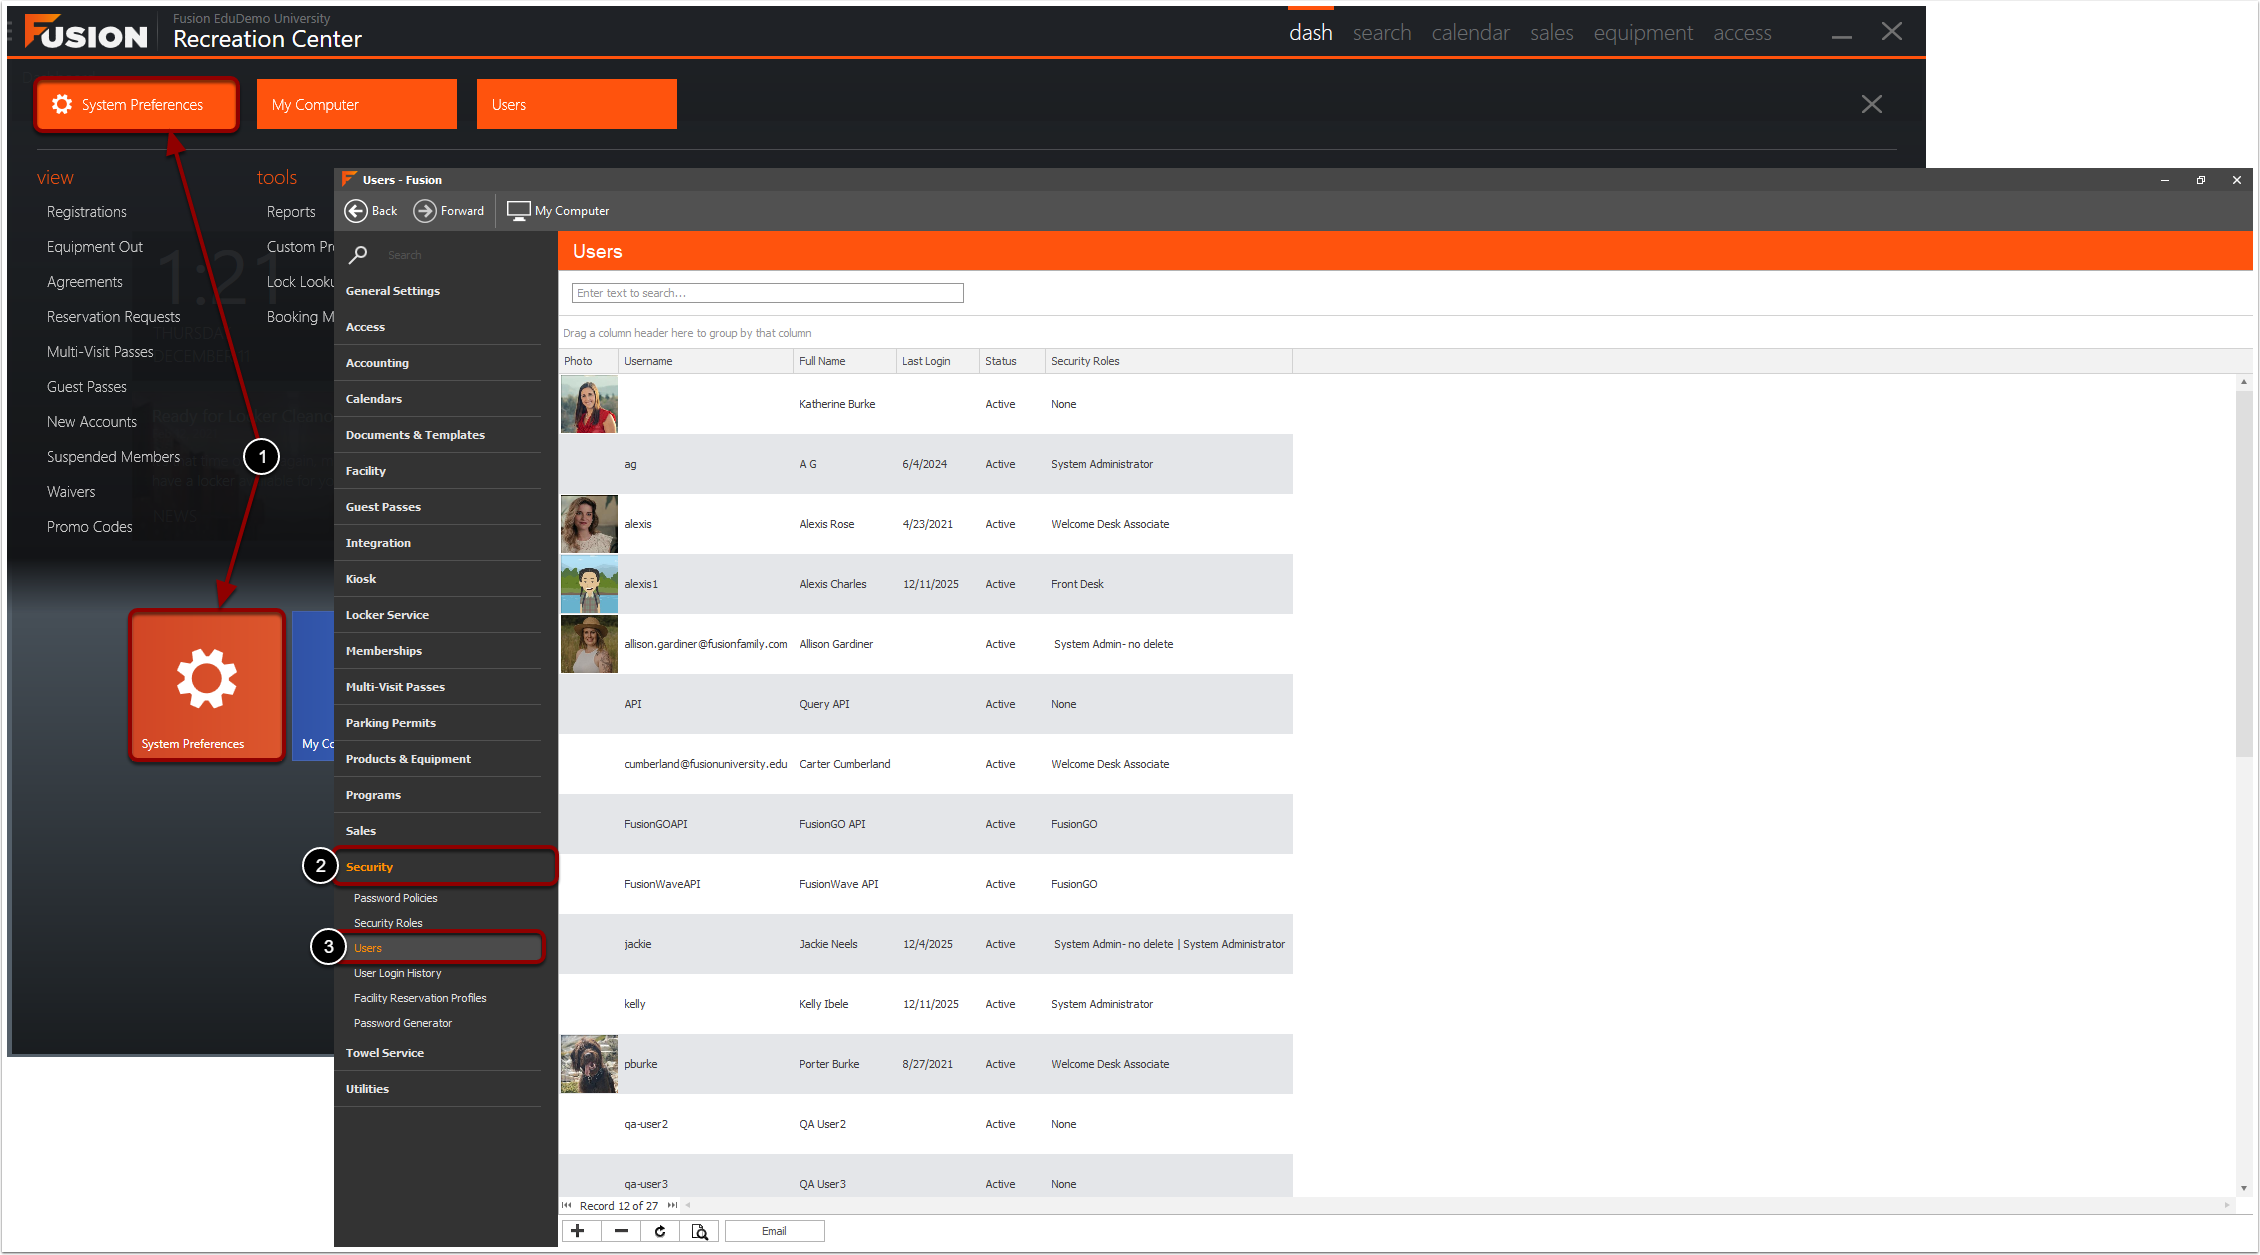
Navigate to System Preferences within the Fusion button drop-down menu OR navigate to System Preferences by selecting the icon from the Dashboard.
Click Security.
Click Users.
Empty space, drag to resize
To remove a person's Fusion desktop application access, you would:
Click the desired person. This will highlight their name.
Click the minus button.
Click Yes to confirm the removal.
Please note this will only remove the person's Fusion desktop application user access. This will not delete their main account from Fusion or remove their Member Portal access.
Empty space, drag to resize
In with the new!
The new year often means onboarding new staff, student employees, or instructors. This is the perfect opportunity to add users intentionally!
The first option for creating a new user is from their profile. This is recommended if the person already has an account in Fusion. You can use our tutorial below to learn how to do this!
Empty space, drag to resize
Add a new person from the User area
If a person does not already have an account created in Fusion, you can add them as new from the User area. Please note if you add a person from the User area and they already exist in Fusion, it will create a second account for that person.
To navigate to the Users area in Fusion:
Navigate to System Preferences within the Fusion button drop-down menu OR navigate to System Preferences by selecting the icon from the Dashboard.
Click Security on the left sidebar.
Click Users.
Empty space, drag to resize
Create a New User
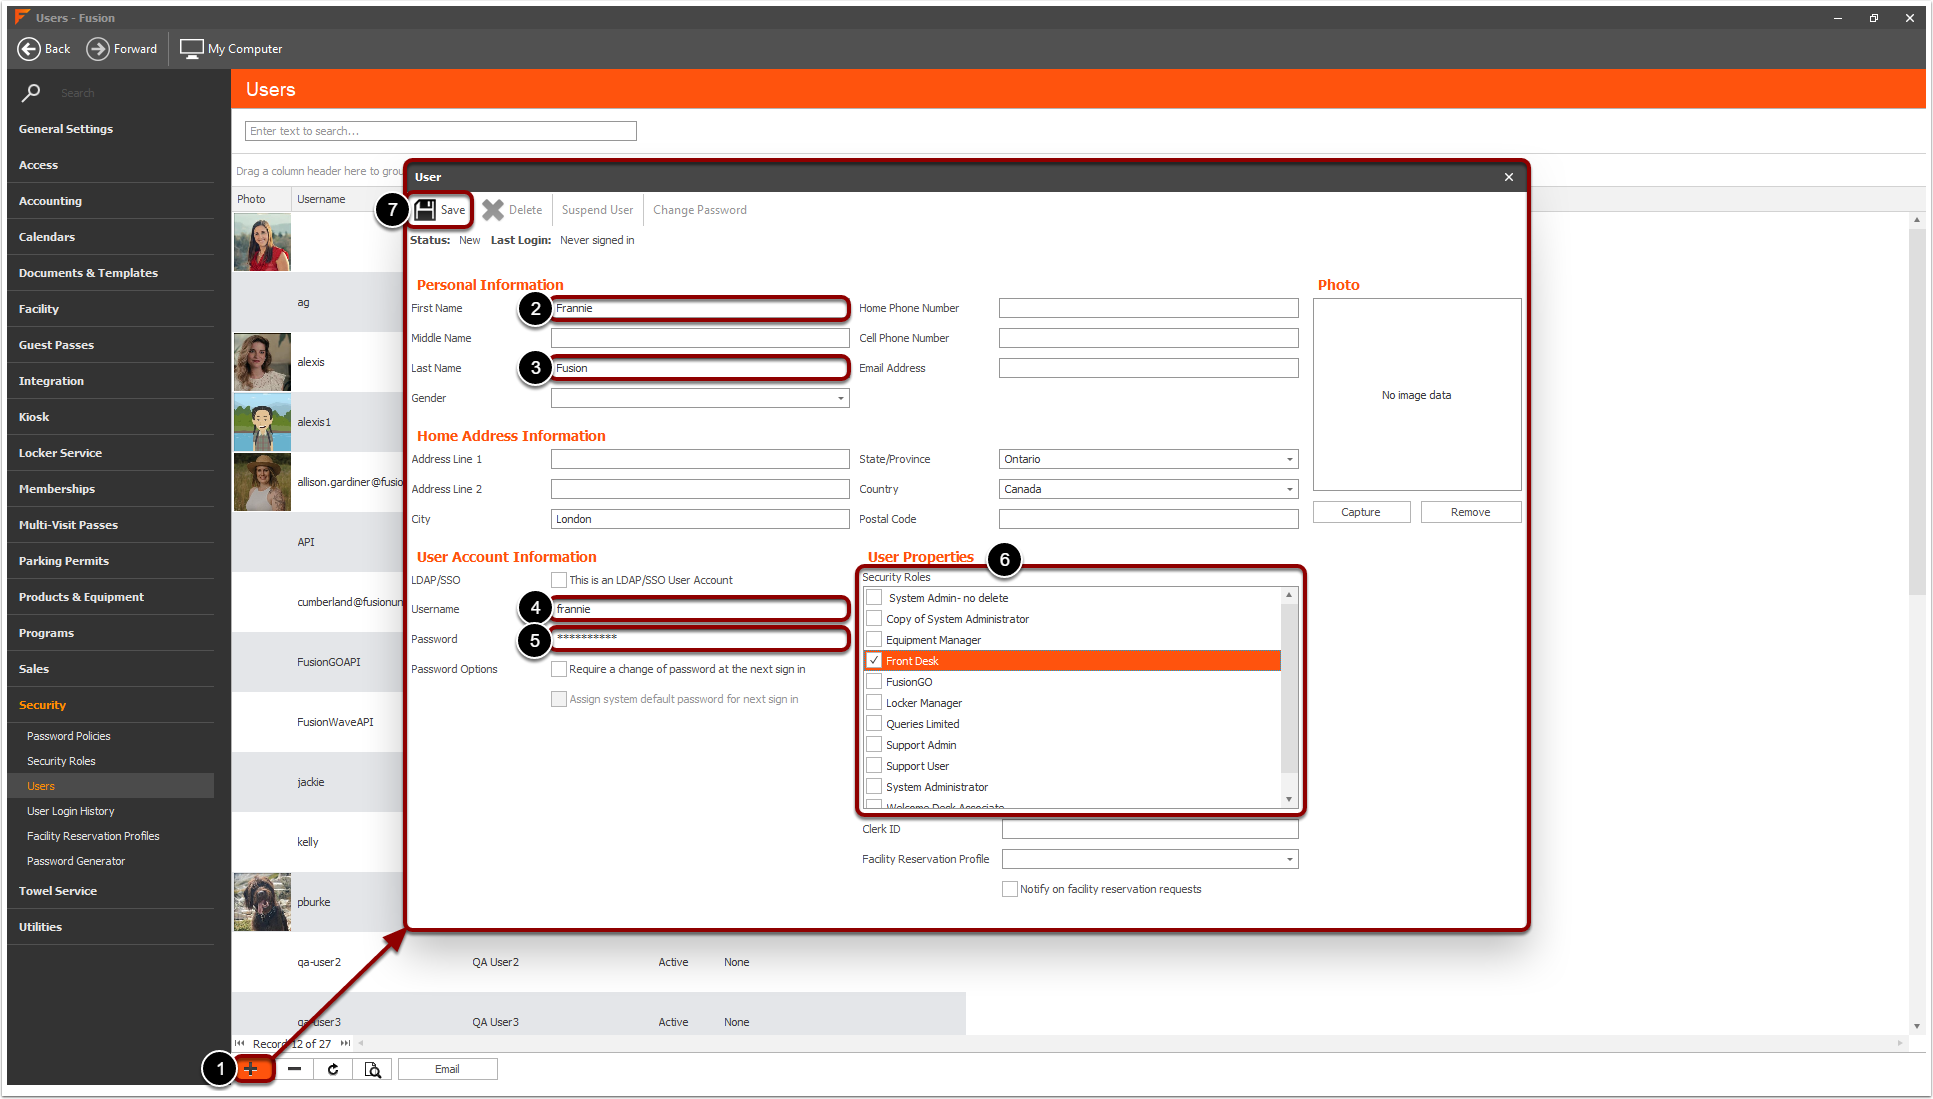
To create a new user from this view:
Click the plus in the bottom left.
Enter the user's First Name.
Enter the user's Last Name.
Enter the desired Username for the user.
Enter the desired Password for the user.
Check the desired Security Role for this user.
Click Save.
You can fill in other details if desired, but these will be the minimum you will want to configure!
Empty space, drag to resize
Refresh the current
Don't forget you might have promoted some people at the end of the semester! Remember to update their permissions so they can do all that they need to do in the new year!
Empty space, drag to resize
Refreshing your user list at the start of the year creates a strong foundation. New year, new users, clean slate!
Make user list cleanup a yearly habit, and your future self will thank you. Happy 2026, Fusion Fam!