Sep 1

How to Properly Say Goodbye to Old Programs

Some programs just need to ride off into the sunset. Here's how to do it cleanly. 

You know that feeling when you scroll through your program list and spot something like Summer Youth Camp 2019 just… sitting there? No participants. No future sessions. Just vibing in your active program list like it pays rent. We've all been there.

The temptation is to leave it alone; deleting it outright means losing the history, the data, and the story it tells. But there's a better way. Archiving, on the other hand, is a graceful goodbye that lets you tuck those programs neatly out of sight without losing a shred of historical data. Think of it as the program equivalent of moving something to the attic instead of the dumpster.

Here's the three-step process to get it done right.

Step 1 — Create your "Archived" Program Classification
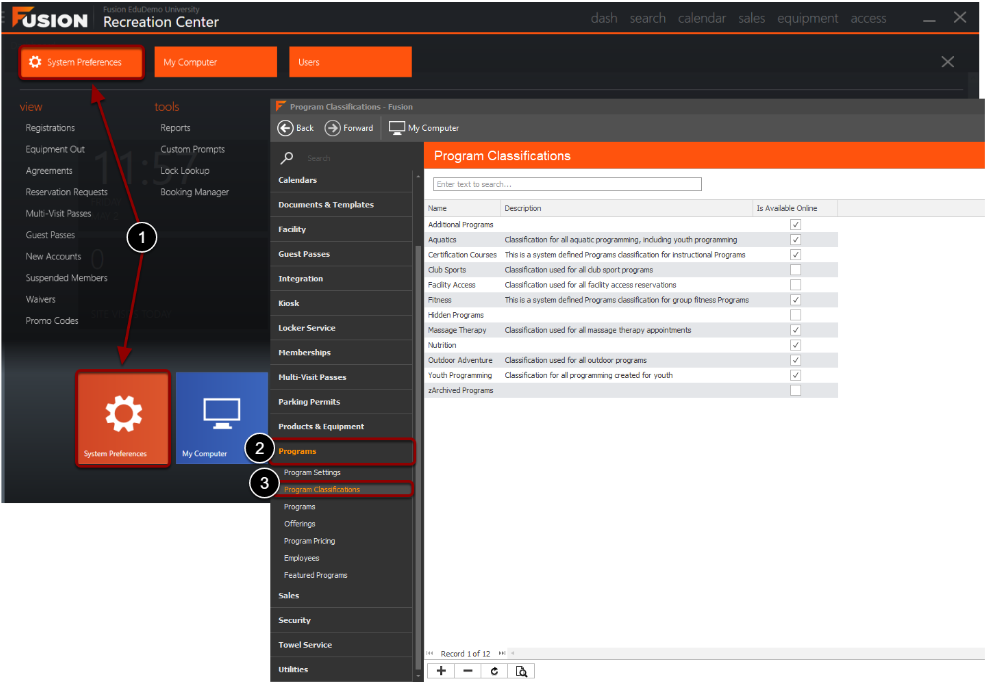
Before you can archive anything, you need to give Fusion a classification to put things into. Program Classifications are the top-level buckets that organize your programs, so this is your first step.
  1. Navigate to System Preferences within the Fusion button drop-down menu OR navigate to System Preferences by selecting the icon from the Dashboard.
  2. Click Programs on the left sidebar.
  3. Click on Program Classifications.

Step 2 — Create an "Archived" Program Category
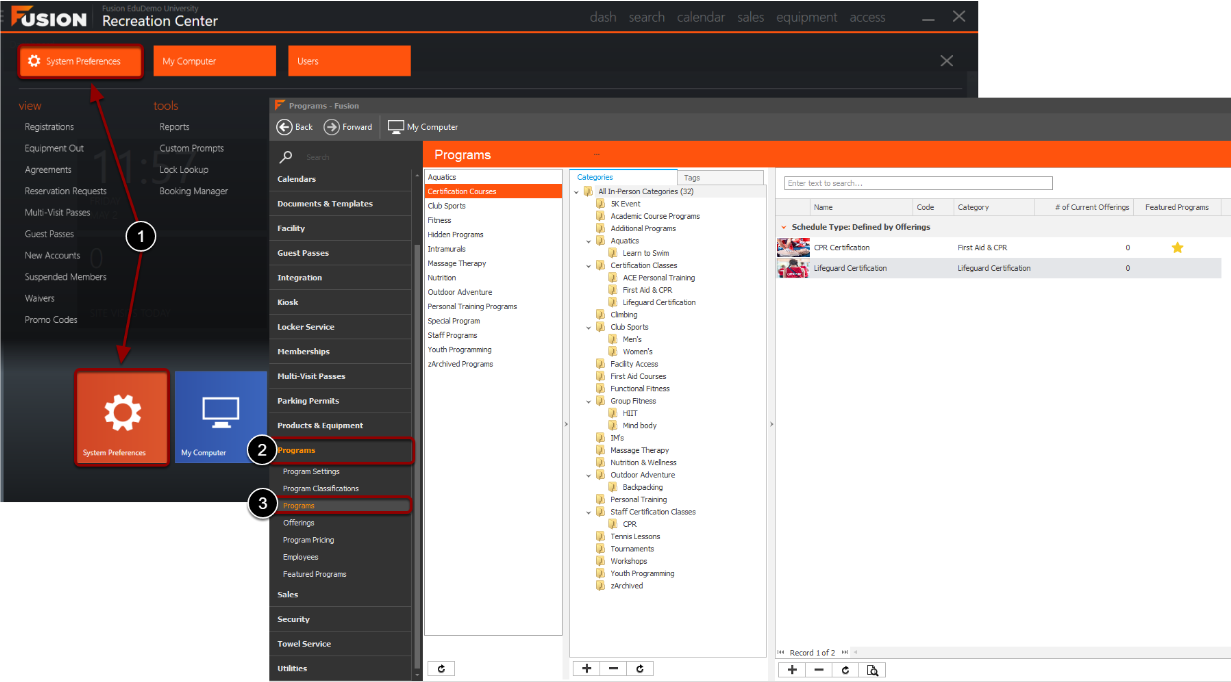
Classifications are the big buckets; Categories are how you sort within them. You'll want a matching Archived category that lives inside your new Archived classification. This keeps everything tidy and ensures your archived programs don't accidentally mingle with your active ones.
  1. Navigate to System Preferences within the Fusion button drop-down menu OR navigate to System Preferences by selecting the icon from the Dashboard.
  2. Click Programs on the left sidebar.
  3. Click on Programs.

Empty space, drag to resize

Step 3 — “Archive” your programs

Now for the satisfying part: actually filing those old programs away. This step is about updating the classification and category on each program you want to retire. You're not deleting anything; all the enrollment history, transaction records, and reporting data stays intact. You're just moving things to the right drawer.
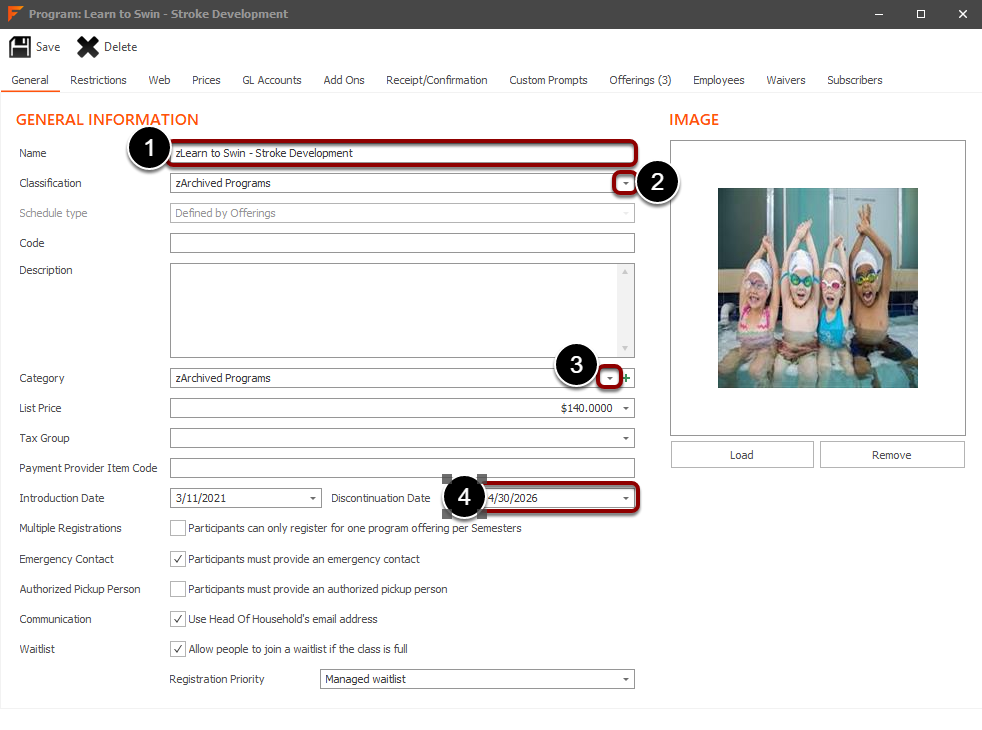
  1. Update the Name.  We recommend adding a 'z' in front of Program name, as this can help with reporting.  Doing this will put all "archived" programs together in your report list so you know which ones are no longer being offered.
  2. Update the Classification to the "Archived" option.
  3. Update the Category to the "Archived" option.
  4. Enter the Discontinuation Date.  This will ensure the program no longer appears for registrations. 

A clean list is a happy list

Archiving programs isn't just a housekeeping task. It's an investment in your future self. Every time a colleague searches for a program, every time a new staff member tries to understand your offerings, every time you're pulling a report and filtering by active programs, you'll be glad you took the hour to do this.

The data isn't gone. The history isn't lost. It's just organized. And honestly? That's the best kind of goodbye.